In my last post I explained why I like using NVM to not only facilitate but manage multiple Node.js installations. In this week’s post I want to share how I set up my terminal on my laptop. I get this question a lot when sharing screenshots or doing a presentation and wanted a resource to point people to. This will be that post.
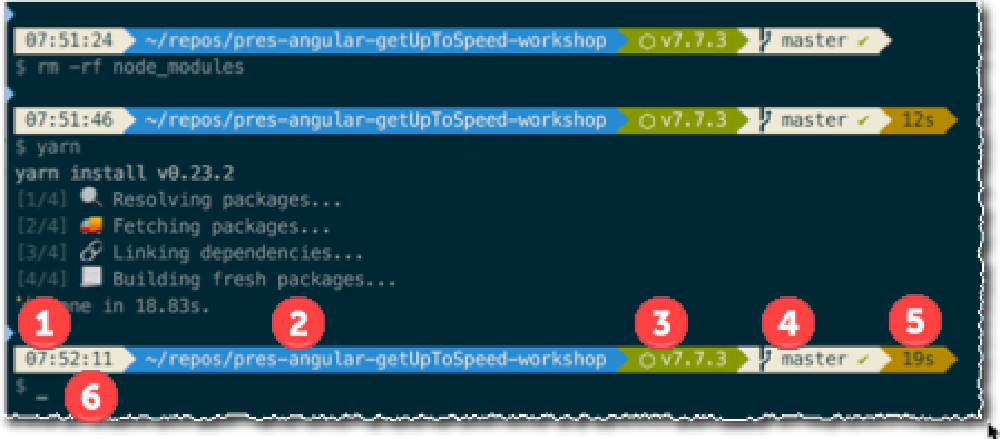
This post will show you how to configure your command prompt to look like this:
Iterm
There are a few key points about this prompt:
- current timestamp
- current working directory
- current version of Node.js (if you are using NVM)
- current git branch name & status (if in a git repo)
- duration of the last command
- newline to enter new commands
The end of this post includes a form where you can download a script & the resources needed to make your prompt look like this.
Oh, before I go too far if you’re a Windows person, this isn’t for you. The closest configurable command prompt I would recommend is Cmder for Windows.
MacOS includes a default command prompt… that is Terminal. Terminal is the interface to the bash command prompt It is very basic just like you’d expect as an OS included tool. For me (and most people), it’s too basic.
A popular alternative to bash is to use Oh My Zsh, a community-driven framework for managing the config of the popular ZSH prompt on UNIX. iTerm is the MacOS Terminal replacement, also community backed, that is very configurable. I use both of these. After getting these set up, I then apply a custom theme and add a few customizations to make my prompt just perfect.
Installing Oh My ZSH & iTerm
The first step is to get Oh My ZSH and iTerm installed. This is easy… especially if you are using Homebrew.
First, install ZSH and ZSH completions using Homebrew:
brew install zsh zsh-completions
Second, install Oh My Zsh on top of ZSH:
curl -L https://raw.github.com/robbyrussell/oh-my-zsh/master/tools/install.sh | sh
Finally, install iTerm2. Using Homebrew, you install it using cask (an addon for Homebrew) so first install cask, then iTerm2:
brew install cask
brew cask install iterm2
Install Fonts
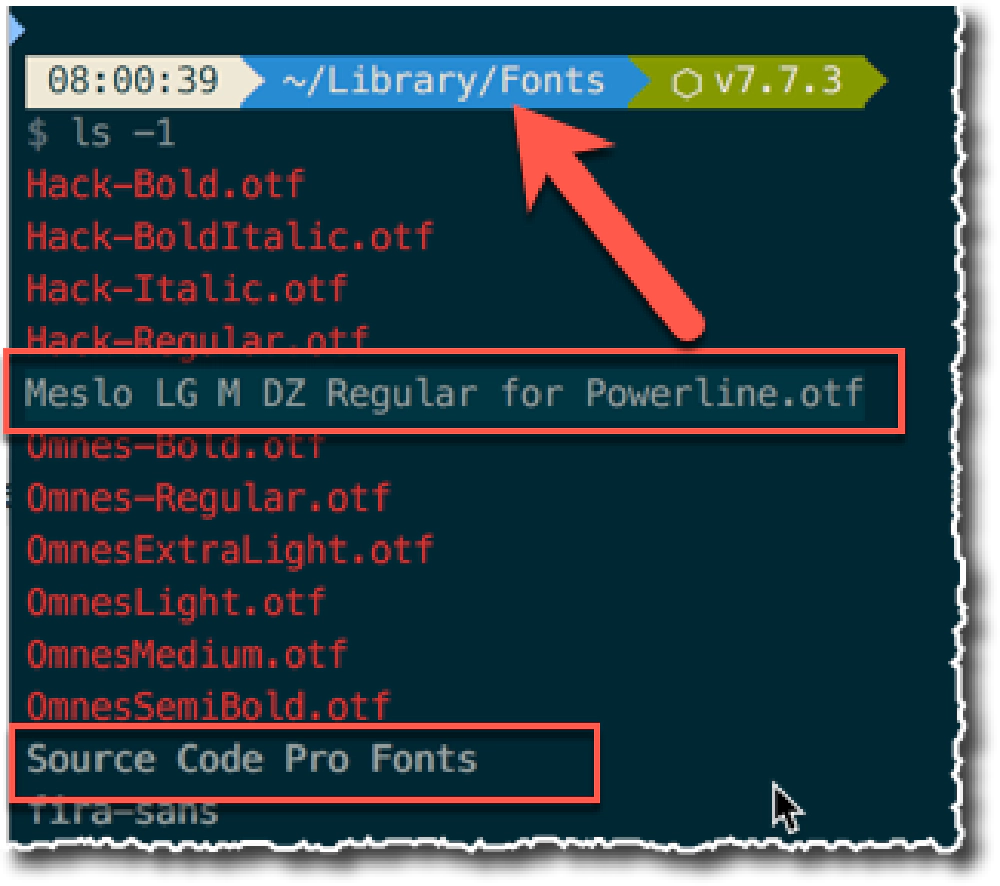
A special font, Powerline, is used to implement the arrows and git branch icons. I also use the Source Code Pro font for some stuff… you can get those from the download folder at the end of this post.
Place these fonts in the ~/Library/Fonts. The Powerline font Meslo LG M DZ Regular for Powerline.otf will be in the root of the ~/Library/Fonts folder & the Source Code Pro font is in a subfolder:
Iterm
Configure iTerm
The next step is to configure iTerm’s settings.
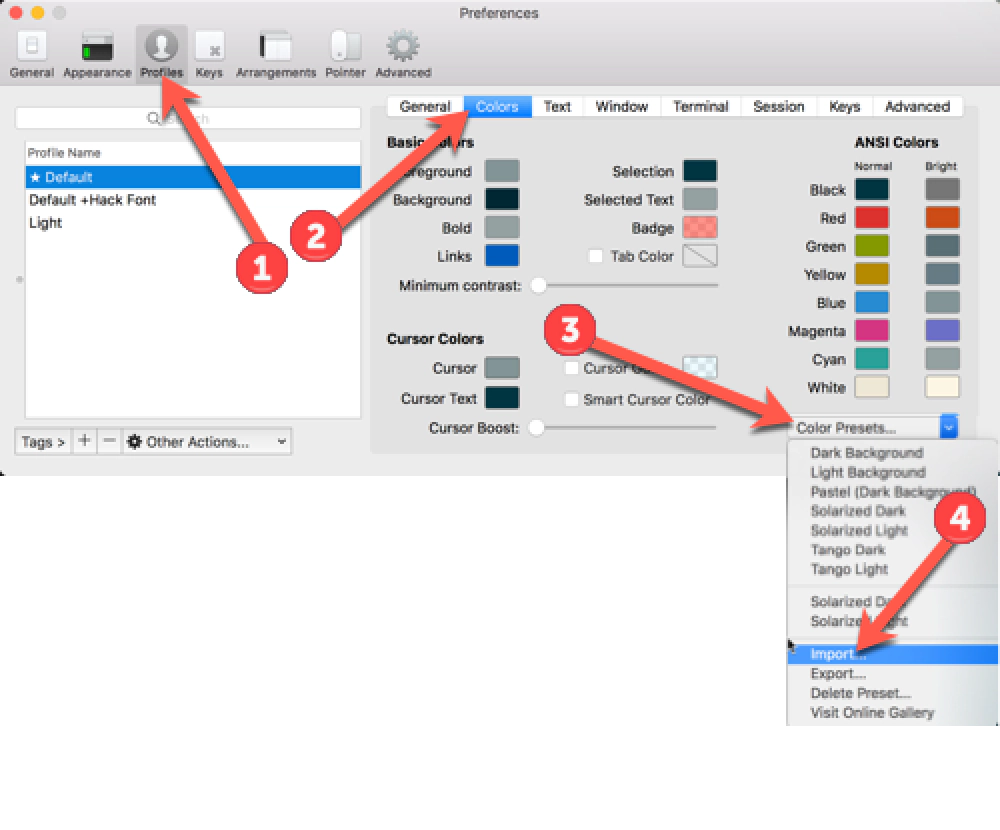
First you need to import a few color profiles. Open the settings for iTerm, go to the Profiles (#1), select the Colors tab (#2), then in the Color Presets.. selector (#3), select Import (#4):
Iterm
Select all three color profiles I have provided in the download at the end of this post when importing:
Solarized Light.itermcolorsSolarized Dark.itermcolorsSolarized Dark (fixed).itermcolors
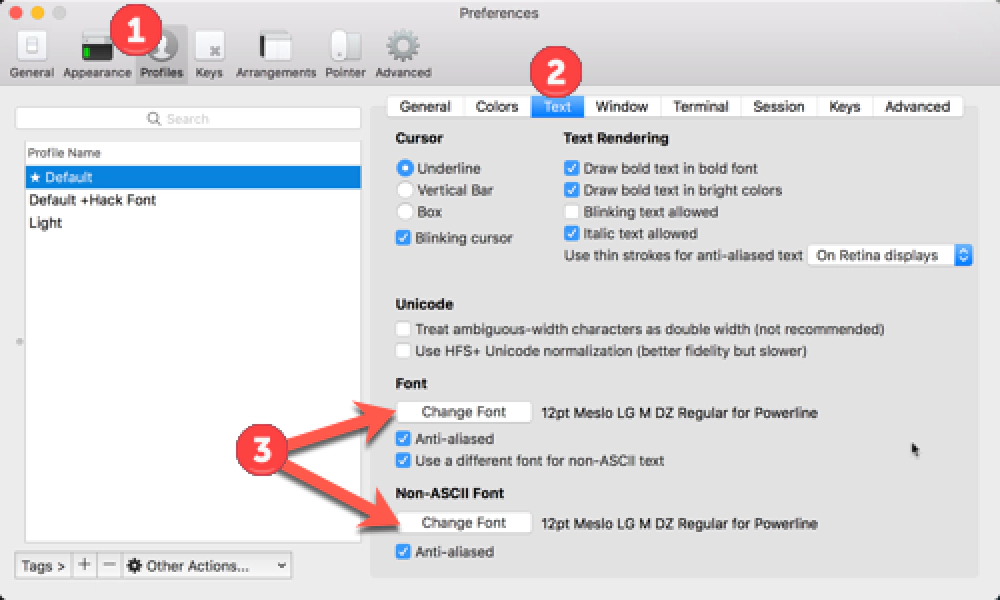
After importing the colors, set iTerm to use the Powerline font that you installed. Within the iTerm settings, select Profiles (#1), select the Text tab (#2) and set the font to Powerline (#3):
Iterm
Add Oh My Zsh Customized Theme “Bullet Train”
Now that you have your command prompt set up with ZSH, Oh My Zsh and customized iTerm to use the correct font & colors, the last step is to import a new theme for Oh My Zsh.
Copy the file bullet-train.zsh-theme to ~/.oh-my-zsh/themes. Feel free to inspect this theme. I won’t get into the details of how custom themes work in this post with Oh My Zsh… if you are interested, head over to their wiki to learn more.
Once the theme has been copied in, you need to configure ZSH to use the them. Open your ~/.zshrc file and locate the ZSH_THEME line. Set the name of the theme to Bullet Train: ZSH_THEME=bullet-train.
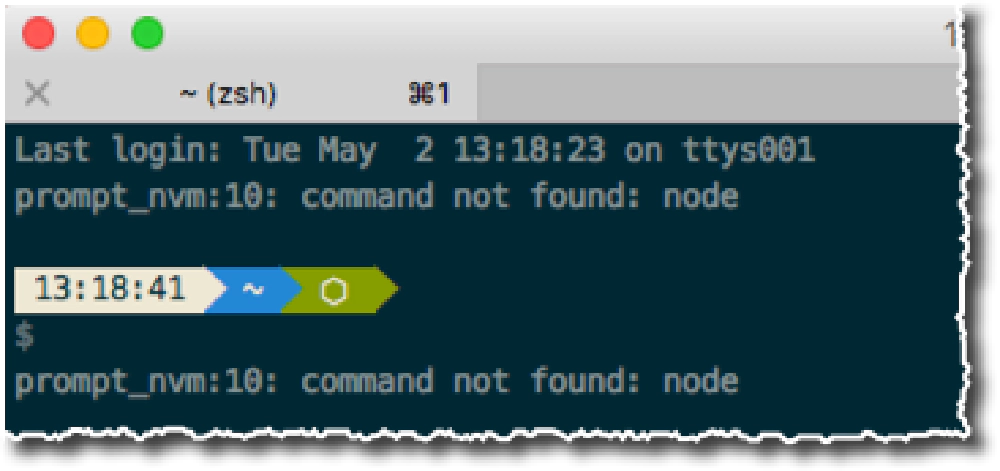
Save your changes and restart iTerm. Tada!
Iterm
Don’t sweat the error you see about node not being found. I demonstrated this using a clean MacOS install so it doesn’t have Node or NVM installed yet, hence why no version is shown in the green section and I’m getting an error message about missing Node.
I’ve created a screencast showing the process I outlined above using a brand new MacOS install.


