Early on, Microsoft Teams introduced webhooks as a way to connect external services to Microsoft Teams channels. Webhooks were provided in two types:
- Outgoing webhooks: In a channel, you register it with a name and provide a secure (https) endpoint. When a user @mentions the outgoing webhook by name in a conversation, Microsoft Teams sends the contents of the message to the endpoint. The endpoint, which is a web service you create, can optionally respond by adding a reply to the conversation.
- Incoming webhook: In a channel, you register it with a name, just like an outgoing webhook, and Microsoft Teams will provide you with a unique endpoint. You then update your web service (or whatever process sends messages to Microsoft Teams) to send an HTTP post to that endpoint to add the message to the channel.
Both incoming and outgoing webhooks require manual, one-time registrations. If you want the same webhook to work in five different channels, you’ll need to manually repeat the registration process five times.
Microsoft also introduced something called an Office 365 Connector, which is just an installable incoming webhook (I’ll explain what these are and how they work in detail in a minute). Over time, Microsoft Teams invested in and favored the bot infrastructure support in Microsoft Azure for web service communication instead of maintaining their own endpoints for handling incoming webhooks and submitting messages to outgoing webhooks.
For a while, Microsoft has been discouraging the use of incoming and outgoing webhooks, including Office 365 Connectors. Recently, Microsoft announced the retirement of Office 365 Connectors on a very aggressive schedule:
- August 15th, 2024 - No new connectors can be created or installed in your Microsoft Teams environment.
October 1, 2024 - Just a month and a half later, all connectors will stop working across all Microsoft Teams deployments.- December 31, 2024 - All connectors will stop working across all Microsoft Teams deployments. See the important alert below for additional informaiton.
Starting August 15, 2024 we will be retiring the Office 365 connectors feature from Microsoft Teams and recommend Power Automate workflows as a solution.
https://devblogs.microsoft.com/microsoft365dev/retirement-of-office-365-connectors-within-microsoft-teams/
Retirement Timeline Update
Microsoft has updated their initial retirement timelines due to overwhelming customer feedback. The new retirement date, December 31, 2024, is reflected in the list above.
Customers can use Office 365 connectors until December 31, 2025 provided they update the connector to post to a new URL that Microsoft will provide by October 2, 2024 (90 days prior to December 31, 2024).
After December 31, 2024, if your connector hasn’t been updated, it will stop working.
The primary reason for this is to align with Microsoft’s focus on security, as outlined in their Secure Future Initiative. From my perspective, it seems Microsoft wants to drop their own webhook infrastructure managed by the Microsoft Teams group. They aim to support only connections from Power Automate and the Azure AI Bot Service, which use more secure implementations. These implementations leverage Microsoft’s Entra ID for external processes to authenticate into the Microsoft Azure bot infrastructure to communicate with Microsoft Teams. In contrast, webhooks either used no authentication or a much less secure process compared to the OAuth-based Microsoft Entra ID.
The announcement from Microsoft recommends customers use Power Automate and the Workflow app. However, you can also migrate your connectors to a bot. Using a bot will enable better code management and deployment, versioning, simpler testing, telemetry, debugging, and transparency.
What are Office 365 Connectors?
Office 365 Connectors offer an installable incoming webhook. How does this work?
Recall from my previous explanation of incoming webhooks: you manually register the incoming webhook in a channel, take the endpoint Microsoft Teams provides, and update your code to post to that endpoint. Then, when your app wants to send a message to all channels where the webhook was registered, it loops through the list of endpoints and sends the message as an HTTP POST to each one.
So, how does an Office 365 Connector differ from these incoming webhooks?
The most significant change is removing the manual aspects of an incoming webhook. Office 365 Connectors introduce the ability to add a configuration step where you can run your own code as a developer.
Your Office 365 Connector, deployed as an app to your Microsoft Teams environment, can be installed in a channel similar to an incoming webhook. However, when it’s installed, Microsoft Teams displays your configuration dialog where you can collect configuration details. Upon submitting the configuration dialog, your code will programmatically get the URL for the unique endpoint for the channel from Microsoft Teams using the Teams JavaScript SDK and save it to your app’s codebase along with any other settings collected in the configuration page.
From there, it works like an incoming webhook. When your app wants to send a message to all channels where the webhook was registered, it loops through the list of endpoints and sends the message as an HTTP POST to each one.
But… Office 365 Connectors are going away, and going away quickly.
You can implement the same setup using a bot by following the notification or proactive message pattern!
Port Office 365 Connectors to Microsoft Teams Bots
Now you can do the exact same thing in an Office 365 Connector that you can do with a bot. Many parts of the bot are the same as the Office 365 Connector!
How is it the same?
You still own the code for the custom developer-hosted service that sends the messages. So, you still need to get a list of all the endpoints where it’s been installed and then have your code enumerate through those endpoints.
But how are we going to get those endpoints into our service? That’s where it’s different. You don’t have to keep track of all the channels where the bot was installed like you had to keep track of the webhook installs.
Bots are registered in the Azure AI Bot Service, and each bot is associated with a Microsoft Entra ID. Your web service will connect to the Azure AI Bot Service by authenticating with Microsoft Entra ID. For every channel where your bot is installed, instead of you keeping track of these, Microsoft Teams and the Azure AI Bot Service handle that for you.
Your app or web service will authenticate with Microsoft Entra ID and connect to the Azure AI Bot Service, asking for a list of all places where the bot is installed. Your code will then go through that install list, allowing you to send notifications to all the Microsoft Teams channels where it’s installed.
Microsoft Teams Bots Improve on Office 365 Connectors
In addition to not having to keep track of all the locations where the bot is installed…
Because the bot created the message, the bot can change or delete the message in the future. This allows a notification sent as an Adaptive Card to become an interactive mini-application by replacing the existing message with a new Adaptive Card. This differs from Office 365 Connectors, which can’t change their own messages.
Moreover, the bot can monitor interactions like reactions, such as thumbs up or thumbs down on a message, and receive notifications to respond or update the message. In fact, you can go further than Office 365 Connectors by having the bot receive messages through user replies.
How to - Create a Notification Bot
The Microsoft Teams documentation and Teams Toolkit templates refer to these as notification bots, also known as proactive bots. However, you don’t have to create a new bot codebase or follow their templates exactly. You can modify your existing Office 365 Connector to use the Azure AI Bot Service infrastructure in your code.
Once you have registered the Microsoft 365 Entra ID application, you can use the ConversationBot class from the Microsoft Teams Toolkit package @microsoft/teamsfx to connect to the Azure AI Bot Service and send messages.
Start by creating a new configuration for the bot:
const notificationApp = new ConversationBot({
  adapterConfig: {
    MicrosoftAppId: config.botId,             // aka: MS Entra ID app's client ID
    MicrosoftAppPassword: config.botPassword, // aka: MS Entra ID app's client secret
    MicrosoftAppType: "MultiTenant",
  },
  notification: {
    enabled: true,
  },
});
Then, use the Azure AI Bot Service to get a list of all the channels where the bot is installed by calling the getPagedInstallations() method. Loop through each, sending a message or an Adaptive Card similar to how you would with an Office 365 Connector:
const pageSize = 100;
let continuationToken: string | undefined = undefined;
do {
  // get a list of all channels where the bot is installed
  const pagedData = await notificationApp.notification.getPagedInstallations(pageSize, continuationToken);
  const installations = pagedData.data;
  continuationToken = pagedData.continuationToken;

  // for each location where the bot is installed...
  for (const target of installations) {
    // send a message to that channel
    await target.sendMessage('Notification message from the bot.');
    // ... or send an Adaptive Card
    // await target.sendAdaptiveCard(card);
  }

  // repeat while a continuation token is returned to get the next page of installations
} while (continuationToken);
Want an example?
This is one of the concepts I teach in my Microsoft Teams AppDev Accelerator program.
Learn Microsoft Teams app development faster to be the irreplaceable expert delivering more to your customers!
https://www.voitanos.io/course-msteams-appdev-accelerator/

The next cohort of my program starts in mid-September 2024 & I just opened enrollment but it’s limited to 20 students. Learn more and apply to join about the next cohort. Save 30% off your registration through August 7!
Want to see how it works? Get the code using the form below to see a working sample. It listens on two endpoints:
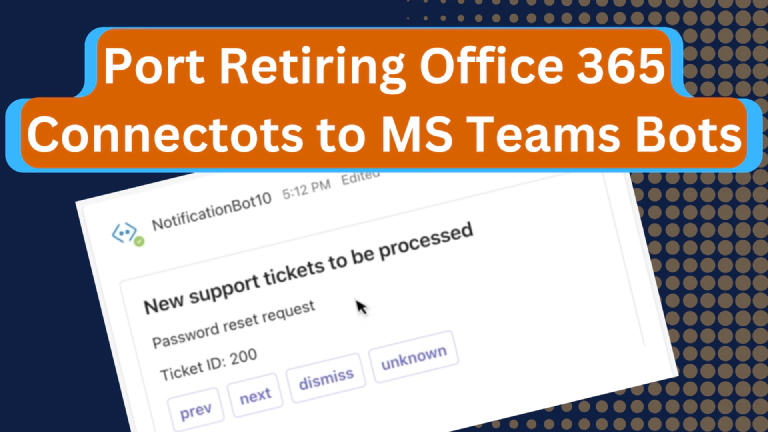
- /api/supportTicketNotification - When an HTTP POST is received, it sends an Adaptive Card where the bot has been installed listing all the recent support tickets. Trigger this using a tool like Postman to kick off the notification.
- /api/messages - When the selects either the next or previous button on the Adaptive Card, it posts back to the bot which responds with the previous or next support ticket in the list, replacing the existing message.
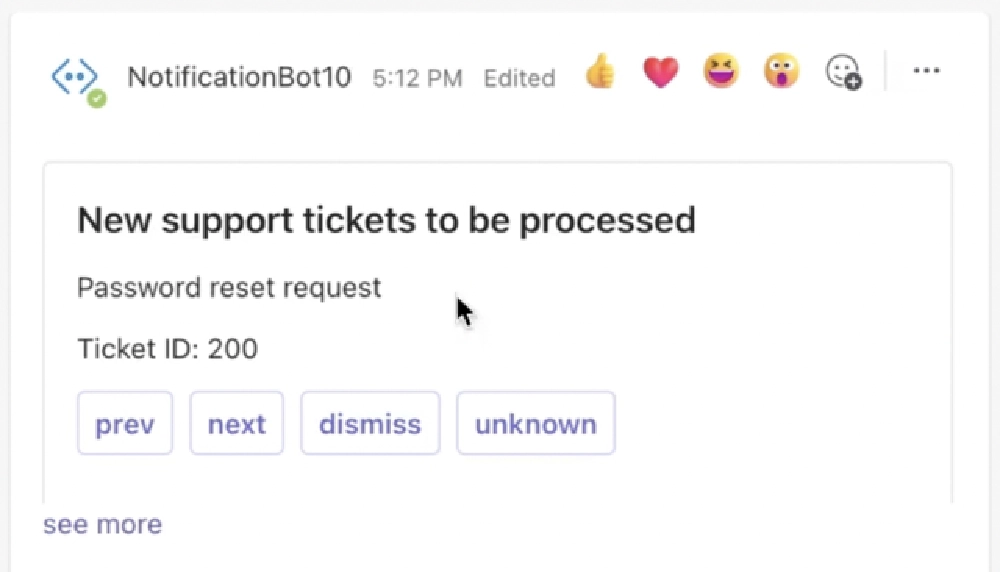
Microsoft Teams Message from Notification Bot
Download Article Resources
Want the resources for this article? Enter your email and we'll send you the download link.
Microsoft MVP, Full-Stack Developer & Chief Course Artisan - Voitanos LLC.
Andrew Connell is a full stack developer who focuses on Microsoft Azure & Microsoft 365. He’s a 21-year recipient of Microsoft’s MVP award and has helped thousands of developers through the various courses he’s authored & taught. Whether it’s an introduction to the entire ecosystem, or a deep dive into a specific software, his resources, tools, and support help web developers become experts in the Microsoft 365 ecosystem, so they can become irreplaceable in their organization.
